
Build a coding assistant tool for generating Flutter user interfaces, or any code component you want to quickly iterate on. Creating user interfaces can be fun and rewarding, but it's also hard work. It's not just a question of getting the code right, it's also getting the look and feel right, and getting your team to agree on a design direction.
This tutorial shows you how to extend Flutter Theme Agent, an AI-powered code assistance tool built by the Flutter Developer Relations team at Google. This open source project is an extension for Microsoft Visual Studio Code (VS Code) that generates specific components of a Flutter theme, or ThemeData object, including color schemes, text styles, and button styles. You can modify the project to make these existing functions work better for you, or build new commands to better support your development workflow.
For a video overview of the project and how to extend it, including insights from the folks who built it, check out AI Flutter Code Generator - Build with Google AI. Otherwise you can get started extending the project following the instructions below.

Figure 1. Flutter Theme Agent running in VS Code Extension Development Host window.
Project setup
These instructions walk you through getting the Flutter Theme Agent project set up for development and testing. The general steps are Installing some prerequisite software, setting a few environment variables, cloning the project from the code repository, and running the configuration installation.
Install the prerequisites
The Flutter Theme Agent project runs as an extension of Microsoft
Visual Studio Code (VS Code), and uses
Node.js and npm to manage packages and run the
application. The following installation instructions are for a Linux host
machine.
To install the required software:
- Install Visual Studio Code for your platform.
- Install
nodeandnpmby following the installation instructions for your platform. - If you haven't already installed Flutter for VS Code, follow the installation instructions.
Clone and configure the project
Download the project code and use the npm installation command to download
the required dependencies and configure the project. You need
git source control software to retrieve the project
source code.
To download and configure the project code:
Clone the git repository using the following command.
git clone https://github.com/google/generative-ai-docs`Optionally, configure your local git repository to use sparse checkout, so you have only the files for the Docs Agent project.
cd generative-ai-docs/
git sparse-checkout init --cone
git sparse-checkout set examples/gemini/node/flutter_theme_agent
Navigate to the Flutter Theme Agent project root directory.
cd generative-ai-docs/examples/gemini/node/flutter_theme_agent/Run the install command to download dependencies and configure the project:
npm install
Configure and test the extension
You should now be able to test your installation by running Flutter Theme Agent as a development extension in VS Code on your device. The test opens a separate VS Code Extension Development Host window where the new extension is available. In this new window, you configure the API Key the extension uses to access the Google Gemini API.
To configure and test your setup:
- Start the VS Code application.
- In VS Code, create a new window by selecting File > New Window.
- Open the Flutter Theme Agent project by selecting File > Open Folder,
and selecting the
flutter_theme_agent/folder. - In VS Code, open the
flutter_theme_agent/package.jsonfile. - Run the extension in debug mode by selecting Run > Start Debugging. This step opens a separate VS Code Extension Development Host window.
- Open the VS Code settings by selecting Code > Settings > Settings.
- Get a Google Gemini API Key from the Generative AI Developer site, and copy the key string.
Set the API key as a configuration setting. In Search Settings field, type
flutter theme, select the User tab, and in the Google > Gemini: Api Key setting, click the Edit in settings.json link, and add your Gemini API key:"google.ai.apiKey": "your-api-key-here"Save the changes to the
settings.jsonfile and close the settings tabs.
To test the extension commands:
- In the VS Code Extension Development Host window, write in a code comment describing the user interface component you want to generate.
- Select the comment text with the component characteristics.
- Open the command palette by selecting View > Command Palette.
- In the Command Palette, type
Flutter Themeand select one of the commands with that prefix.
Modify existing command
Modifying the commands provided in Flutter Theme Agent is the simplest way to change the behavior and capabilities of the extension.
Both the comment and review commands use a few shot prompting approach with examples of code and comments for that code, as well as some general instructions for the AI language model. This prompt context information guides the Gemini language model in generating a response. By changing the prompt instructions, examples, or both in either the comment or review commands, you can change how each of the existing commands behave.
This set of instructions explains how to modify the buttonstyle.ts command by
changing the prompt text of the command.
To prepare to edit the buttonstyle.ts command:\
- Start the VS Code application.
- In VS Code, create a new window by selecting File > New Window.
- Open the Flutter Theme Agent project by selecting File > Open Folder,
and selecting the
flutter_theme_agent/folder. Open
flutter_theme_agent/src/buttonstyle.tsfile.To modify the behavior of the
buttonstyle.tscommand:\In the
buttonstyle.tsfile, edit theBUTTONSTYLE_CONTEXTconstant to include different instructions.const BUTTONSTYLE_CONTEXT=` ButtonStyle should only define properties that exist for a ButtonStyle object. ButtonStyle objects have the following properties. The buttons can ONLY be styled by setting these properties. No other properties: alignment → AlignmentGeometry? // The alignment of the button's child. ...Optionally, in the
buttonstyle.tsfile,BUTTONSTYLE_CONTEXTconstant, add another example of a button style instruction and output, or replace one of the existing examples.... Here's an example prompt: Create a ButtonStyle where the button is green by default and blue on hover state. And elevation is 14, no surface tint color, and the splash effect is turned off. Here's an example of good Dart code: ButtonStyle( backgroundColor: MaterialStateProperty.resolveWith<Color?>( ...Save the changes to the
buttonstyle.tsfile.
To test the modified command:
- In your VS Code extension project window, restart the debugger by selecting Run > Restart Debugging.
In the VS Code Extension Development Host window, select a code comment in the editor window describing the button style you want, for example:
// blue, lickable buttons that light up when you hover over them`Open the command palette by selecting View > Command Palette.
In the Command Palette, type
Flutterand select the Flutter Theme Agent: Create a Flutter ButtonStyle command.
Create new command
You can extend the Flutter Theme Agent by creating new commands that perform
completely new tasks with the Gemini API. Each command file, such as
buttonstyle.ts and colorscheme.ts, are mostly self-contained, and includes
code for collecting text from the active editor, composing a prompt, connecting
to the Gemini API, sending a prompt, and handing the response.
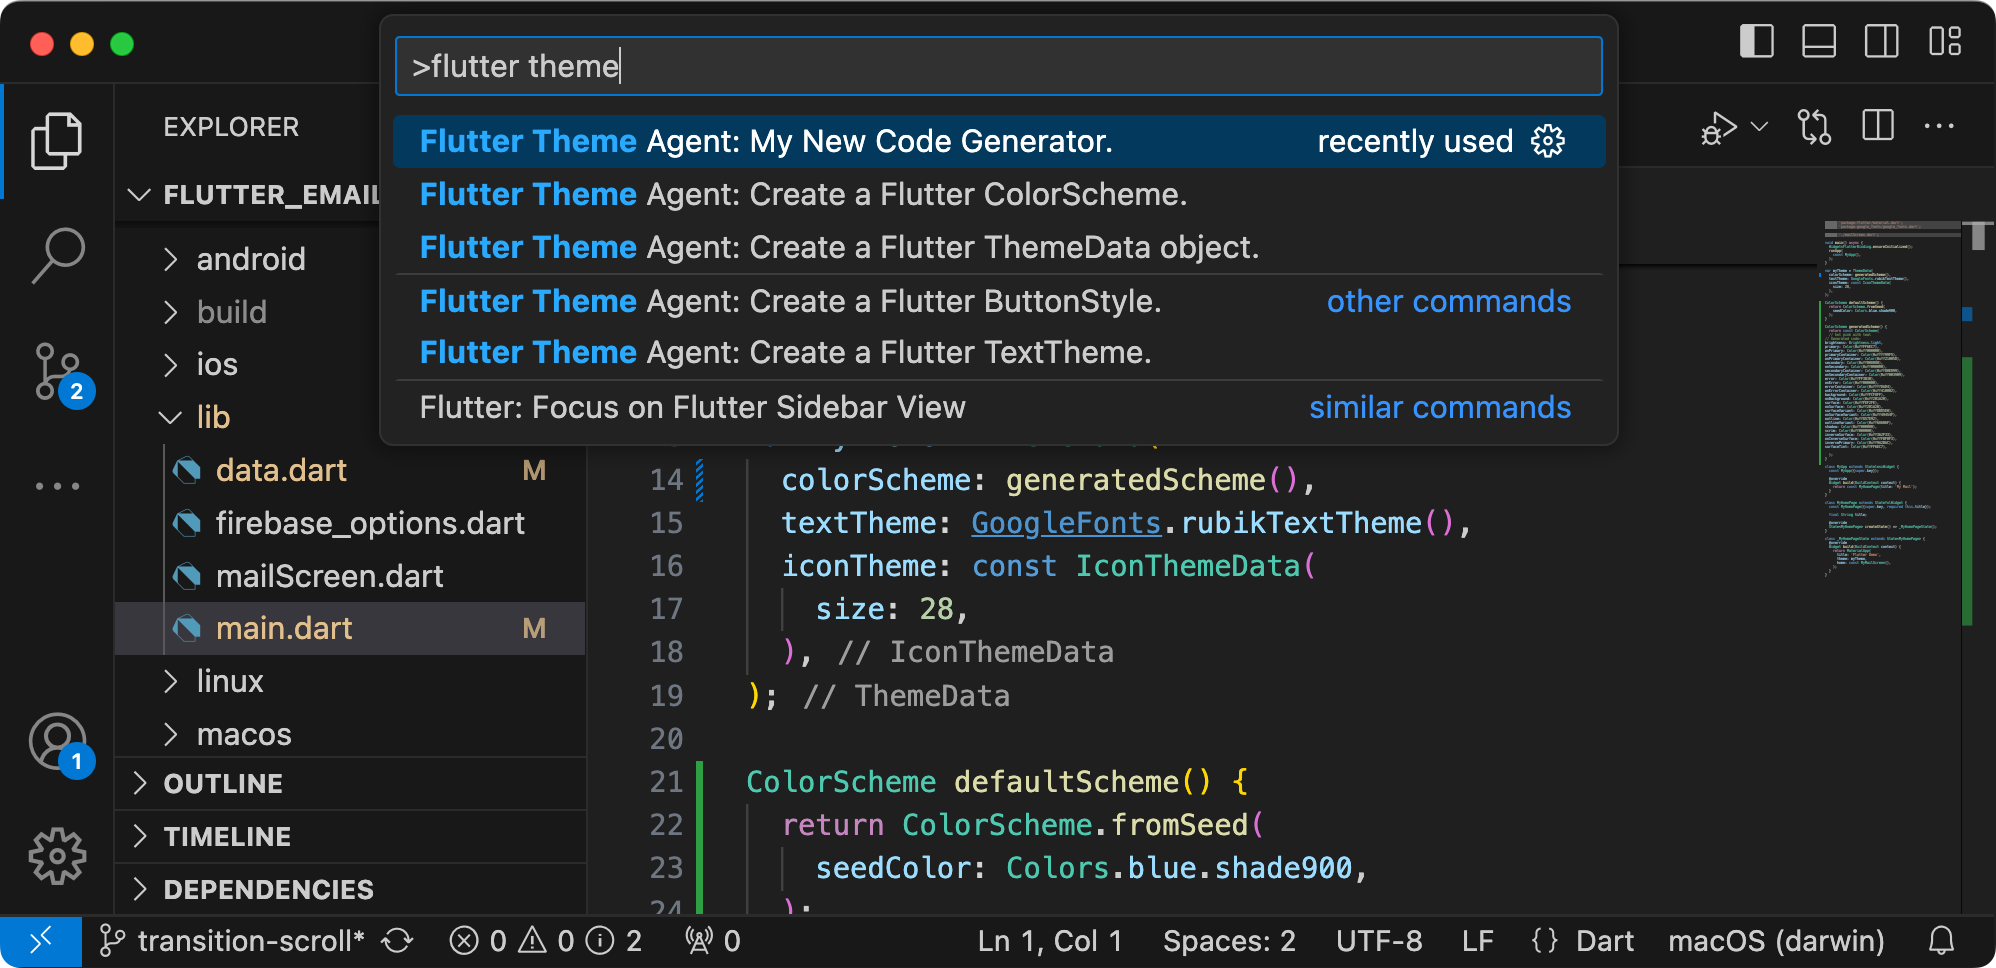
Figure 2. New Flutter Theme Agent command in the VS Code Extension Development Host window.
This set of instructions explains how to build a new command using the code of
an existing command, colorscheme.ts, as a template. This update changes the
command to not include the enclosing syntax of the ColorScheme object, so that
you don't have to remove this syntax after generation, and visualize the output
faster.
To create command that generates just a list of colors for a ColorScheme
object:
- Make a copy of the
flutter_theme_agent/src/colorscheme.tsfile calledcolorscheme2.tsin thesrc/directory. - In VS Code, open the
src/colorscheme2.tsfile. In the
colorscheme2.tsfile, rename thegenerateColorSchemefunction togenerateColorScheme2:export async function generateColorScheme2(){ vscode.window.showInformationMessage('Generating Color Scheme...');Change the prompt instructions in the
colorscheme2.tsfile. Edit theCOLORSCHEME_CONTEXTcode generation instructions by removing theColorScheme(text from the example code on line 51, and make it an empty line.... Here's the example of good Dart code: brightness: Brightness.light, primary: Color(0xffFF80AB), ...Remove the closing parentheses character "
)" from the end of the list of colors and make it an empty line.... inversePrimary: Color(0xffD15B9D), surfaceTint: Color(0xffFF80AB), This example code is a good ...Repeat these changes for the second example. In the
COLORSCHEME_CONTEXTstring on line 87, remove theColorScheme(text and make it an empty line.On line 115, remove the closing parentheses character "
)" from the end of the list of colors and make it an empty line.In the
COLORSCHEME_CONTEXTstring, add an instruction to not include the enclosing syntax:... - The color scheme must be accessible and high-contrast. In the response, only include the list of colors and nothing else. Do not include a starting "ColorScheme(" prefix or an ending ")" suffix. Here's an example user prompt: ...Save the changes to the
colorscheme2.tsfile.
Integrate the new command
After you complete the code for the new command, you need to integrate it with
the rest of the extension. Update the extension.ts and package.json files to
make the new command part of the extension, and enable VS Code be able to invoke
the new command.
To integrate the new command with the extension code:
- In VS Code, open the
flutter_theme_agent/src/extension.tsfile. Import the new command code to the extension by adding a new import statement.
import { generateColorScheme2 } from './components/colorscheme2';Register the new command by adding the following code to the
activate()function.export function activate(context: vscode.ExtensionContext) { ... vscode.commands.registerCommand('flutter-theme-agent.generateColorScheme2', generateColorScheme2); ... }Save the changes to the
extension.tsfile.
To integrate the name command with the extension package:
- In VS Code, open the
flutter_theme_agent/package.jsonfile. Add the new command to the
commandssection of the package file."contributes": { "commands": [ ... { "command": "flutter-theme-agent.generateColorScheme2", "title": "Flutter Theme Agent: My New Code Generator." } ],Save the changes to the
package.jsonfile.
Test the new command
Once you have completed coding of the command and integrating it with the extension, you can test it. Your new command is only available in the VS Code Extension Development Host window, and not in the VS Code window where you edited the code for the extension.
To test the modified command:
- In your VS Code extension project window, restart the debugger by selecting Run > Restart Debugging, which restarts a separate Extension Development Host window.
- In the VS Code Extension Development Host window, open a Flutter development project.
- In the same window, open a code editor window, type a comment describing the user interface component you want, and select that comment text.
- Open the command palette by selecting View > Command Palette.
- In the Command Palette, type
Flutter Themeand select the Flutter Theme Agent: My New Code Generator command.
Additional resources
For more information about the Flutter Theme Agent project, see the code repository. If you need help building the application or are looking for developer collaborators, check out the Google Developers Community Discord server.
Production applications
If you plan to deploy Flutter Theme Agent for a large audience, note that your use of the Google Gemini API may be subject to rate limiting and other use restrictions. If you are considering building a production application with the Gemini model, check out Google Cloud Vertex AI services for increased scalability and reliability of your app.