
|
|
|
 View source on GitHub View source on GitHub
|
Overview
Large Language Models (LLMs) can learn new abilities without directly being trained on them. However, LLMs have been known to "hallucinate" when tasked with providing responses for questions they have not been trained on. This is partly because LLMs are unaware of events after training. It is also very difficult to trace the sources from which LLMs draw their responses from. For reliable, scalable applications, it is important that an LLM provides responses that are grounded in facts and is able to cite its information sources.
A common approach used to overcome these constraints is called Retrieval Augmented Generation (RAG), which augments the prompt sent to an LLM with relevant data retrieved from an external knowledge base through an Information Retrieval (IR) mechanism. The knowledge base can be your own corpora of documents, databases, or APIs.
This notebook walks you through a workflow to improve an LLM's response by augmenting its knowledge with external text corpora and performing semantic information retrieval to answer questions using the Semantic Retriever and the Attributed Question & Answering (AQA) APIs of the Generative Language API.
Setup
Import the Generative Language API
# Install the Client library (Semantic Retriever is only supported for versions >0.4.0)pip install -U google.ai.generativelanguage
Authenticate
The Semantic Retriever API lets you perform semantic search on your own data. Since it's your data, this needs stricter access controls than API keys. Authenticate with OAuth with service accounts or through your user credentials.
This quickstart uses a simplified authentication approach meant for a testing environment, and service account setups are typically easier to start from. For a production environment, learn about authentication and authorization before choosing the access credentials that are appropriate for your app.
Setup OAuth using service accounts
Follow the steps below to setup OAuth using service accounts:
- Enable the Generative Language API.
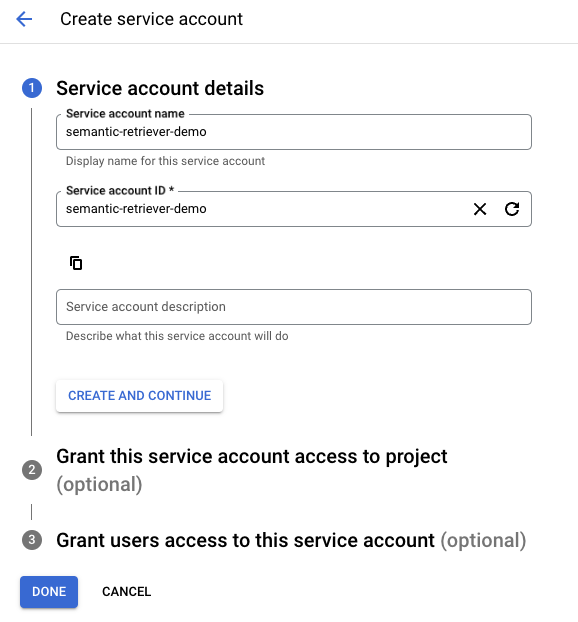
Create the Service Account by following the documentation.
- After creating the service account, generate a service account key.
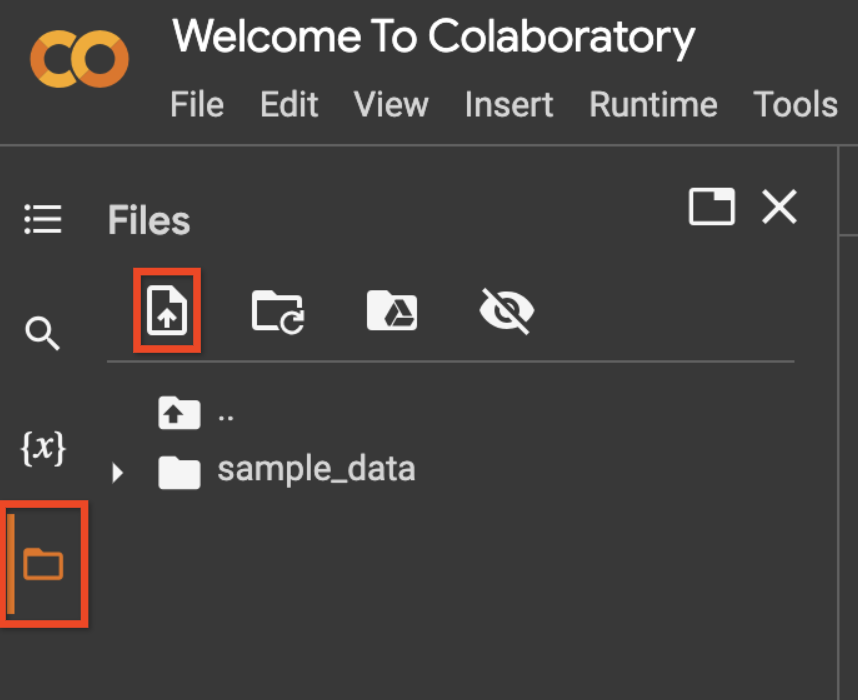
Upload your service account file by using the file icon on the left sidebar, then the upload icon, as shown in the screenshot below.
- Rename the uploaded file to
service_account_key.jsonor change the variableservice_account_file_namein the code below.
- Rename the uploaded file to
pip install -U google-auth-oauthlib
service_account_file_name = 'service_account_key.json'

from google.oauth2 import service_account

credentials = service_account.Credentials.from_service_account_file(service_account_file_name)

scoped_credentials = credentials.with_scopes(
    ['https://www.googleapis.com/auth/cloud-platform', 'https://www.googleapis.com/auth/generative-language.retriever'])
Initialize the client library using the service account credentials.
import google.ai.generativelanguage as glm
generative_service_client = glm.GenerativeServiceClient(credentials=scoped_credentials)
retriever_service_client = glm.RetrieverServiceClient(credentials=scoped_credentials)
permission_service_client = glm.PermissionServiceClient(credentials=scoped_credentials)
Create a corpus
The Semantic Retriever API lets you define up to 5 custom text corpora per project. You can specify either of the following fields while defining your corpora:
name: TheCorpusresource name (ID). Must contain only a maximum of 40 alphanumeric characters. If thenameis empty on creation, a unique name will be generated with a maximum length of 40 characters with a prefix from thedisplay_nameand a 12 character random suffix.display_name: The human-readable display name for theCorpus. Must contain only a maximum of 512 characters, including alphanumerics, spaces, and dashes.
example_corpus = glm.Corpus(display_name="Google for Developers Blog")
create_corpus_request = glm.CreateCorpusRequest(corpus=example_corpus)

# Make the request
create_corpus_response = retriever_service_client.create_corpus(create_corpus_request)

# Set the `corpus_resource_name` for subsequent sections.
corpus_resource_name = create_corpus_response.name
print(create_corpus_response)
name: "corpora/google-for-developers-blog-dqrtz8rs0jg"
display_name: "Google for Developers Blog"
create_time {
  seconds: 1713497533
  nanos: 587977000
}
update_time {
  seconds: 1713497533
  nanos: 587977000
}
Get the created corpus
Use the GetCorpusRequest method to programmatically access the Corpus you created above. The value of the name parameter refers to the full resource name of the Corpus and is set in the cell above as corpus_resource_name. The expected format is corpora/corpus-123.
get_corpus_request = glm.GetCorpusRequest(name=corpus_resource_name)

# Make the request
get_corpus_response = retriever_service_client.get_corpus(get_corpus_request)

# Print the response
print(get_corpus_response)
Create a document
A Corpus can contain up to 10,000 Documents. You can specify either of the following fields while defining your documents:
name: TheDocumentresource name (ID). Must contain only a maximum of 40 characters (alphanumeric or dashes only). The ID cannot start or end with a dash. If the name is empty on creation, a unique name will be derived fromdisplay_namealong with a 12 character random suffix.display_name: The human-readable display name. Must contain only a maximum of 512 characters, including alphanumerics, spaces, and dashes.
Documents also support up to 20 user-specified custom_metadata fields, specified as key-value pairs. Custom metadata can be strings, lists of strings, or numeric. Note that lists of strings can support a maximum of 10 values and numeric values are represented as floating-point numbers in the API.
# Create a document with a custom display name.
example_document = glm.Document(display_name="Introducing Project IDX, An Experiment to Improve Full-stack, Multiplatform App Development")

# Add metadata.
# Metadata also supports numeric values not specified here
document_metadata = [
    glm.CustomMetadata(key="url", string_value="https://developers.googleblog.com/2023/08/introducing-project-idx-experiment-to-improve-full-stack-multiplatform-app-development.html")]
example_document.custom_metadata.extend(document_metadata)

# Make the request
# corpus_resource_name is a variable set in the "Create a corpus" section.
create_document_request = glm.CreateDocumentRequest(parent=corpus_resource_name, document=example_document)
create_document_response = retriever_service_client.create_document(create_document_request)

# Set the `document_resource_name` for subsequent sections.
document_resource_name = create_document_response.name
print(create_document_response)
Get the created document
Use the GetDocumentRequest method to programmatically access the document you created above. The value of the name parameter refers to the full resource name of the document and is set in the cell above as document_resource_name. The expected format is corpora/corpus-123/documents/document-123.
get_document_request = glm.GetDocumentRequest(name=document_resource_name)

# Make the request
# document_resource_name is a variable set in the "Create a document" section.
get_document_response = retriever_service_client.get_document(get_document_request)

# Print the response
print(get_document_response)
Ingest & Chunk a Document
To improve the relevance of content returned by the vector database during semantic retrieval, break down large documents into smaller pieces or chunks while ingesting the document.
A Chunk is a subpart of a Document that is treated as an independent unit for the purposes of vector representation and storage. A Chunk can have a maximum of 2043 tokens. A Corpus can have a maximum of 1 million Chunks.
Similar to Documents, Chunks also support up to 20 user-specified custom_metadata fields, specified as key-value pairs. Custom metadata can be strings, lists of strings, or numeric. Note that lists of strings can support a maximum of 10 values and numeric values are represented as floating-point numbers in the API.
This guide uses Google's Open Source HtmlChunker.
Other chunkers you can use include LangChain or LlamaIndex.
Ingest HTML and chunk via HtmlChunker
!pip install google-labs-html-chunker

from google_labs_html_chunker.html_chunker import HtmlChunker

from urllib.request import urlopen
Get the HTML DOM for a website. Here, the HTML is read directly, but it would
be better to get HTML post-rendering to include Javascript-injected HTML
such as document.documentElement.innerHTML.
with(urlopen("https://developers.googleblog.com/2023/08/introducing-project-idx-experiment-to-improve-full-stack-multiplatform-app-development.html")) as f:
  html = f.read().decode("utf-8")
Break down the text document into passages and create Chunks from these passages. This step creates the Chunk objects themselves and the next section uploads them to the Semantic Retriever API.
# Chunk the file using HtmlChunker
chunker = HtmlChunker(
    max_words_per_aggregate_passage=200,
    greedily_aggregate_sibling_nodes=True,
    html_tags_to_exclude={"noscript", "script", "style"},
)
passages = chunker.chunk(html)
print(passages)


# Create `Chunk` entities.
chunks = []
for passage in passages:
    chunk = glm.Chunk(data={'string_value': passage})
    # Optionally, you can add metadata to a chunk
    chunk.custom_metadata.append(glm.CustomMetadata(key="tags",
                                                    string_list_value=glm.StringList(
                                                        values=["Google For Developers", "Project IDX", "Blog", "Announcement"])))
    chunk.custom_metadata.append(glm.CustomMetadata(key="chunking_strategy",
                                                    string_value="greedily_aggregate_sibling_nodes"))
    chunk.custom_metadata.append(glm.CustomMetadata(key = "publish_date",
                                                    numeric_value = 20230808))
    chunks.append(chunk)
print(chunks)
Batch create chunks
Create chunks in batches. You can specify a maximum of 100 chunks per batch request.
Use CreateChunk() for single chunk creation.
# Option 1: Use HtmlChunker in the section above.
# `chunks` is the variable set from the section above.
create_chunk_requests = []
for chunk in chunks:
  create_chunk_requests.append(glm.CreateChunkRequest(parent=document_resource_name, chunk=chunk))

# Make the request
request = glm.BatchCreateChunksRequest(parent=document_resource_name, requests=create_chunk_requests)
response = retriever_service_client.batch_create_chunks(request)
print(response)
Alternatively, you can make chunks without using the HtmlChunker.
# Add up to 100 CreateChunk requests per batch request.
# document_resource_name is a variable set in the "Create a document" section.
chunks = []
chunk_1 = glm.Chunk(data={'string_value': "Chunks support user specified metadata."})
chunk_1.custom_metadata.append(glm.CustomMetadata(key="section",
                                                  string_value="Custom metadata filters"))
chunk_2 = glm.Chunk(data={'string_value': "The maximum number of metadata supported is 20"})
chunk_2.custom_metadata.append(glm.CustomMetadata(key = "num_keys",
                                                  numeric_value = 20))
chunks = [chunk_1, chunk_2]
create_chunk_requests = []
for chunk in chunks:
  create_chunk_requests.append(glm.CreateChunkRequest(parent=document_resource_name, chunk=chunk))

# Make the request
request = glm.BatchCreateChunksRequest(parent=document_resource_name, requests=create_chunk_requests)
response = retriever_service_client.batch_create_chunks(request)
print(response)
List Chunks and get state
Use the ListChunksRequest method to get all available Chunks as a paginated list with a maximum size limit of 100 Chunks per page, sorted in ascending order of Chunk.create_time. If you do not specify a limit, a maximum of 10 Chunks are returned.
Provide the next_page_token returned in the ListChunksRequest response as an argument to the next request to retrieve the next page. Note that when paginating, all other parameters provided to ListChunks must match the call that provided the page token.
All Chunks return a state. Use this to check the state of the Chunks before querying a Corpus. Chunk states include - UNSPECIFIED, PENDING_PROCESSING, ACTIVE, and FAILED. You can only query ACTIVE Chunks.
# Make the request
request = glm.ListChunksRequest(parent=document_resource_name)
list_chunks_response = retriever_service_client.list_chunks(request)
for index, chunks in enumerate(list_chunks_response.chunks):
  print(f'\nChunk # {index + 1}')
  print(f'Resource Name: {chunks.name}')
  # Only ACTIVE chunks can be queried.
  print(f'State: {glm.Chunk.State(chunks.state).name}')
Ingest another document
Add another Document via HtmlChunker and add filters.
# Create a document with a custom display name.
example_document = glm.Document(display_name="How it’s Made: Interacting with Gemini through multimodal prompting")

# Add document metadata.
# Metadata also supports numeric values not specified here
document_metadata = [
    glm.CustomMetadata(key="url", string_value="https://developers.googleblog.com/2023/12/how-its-made-gemini-multimodal-prompting.html")]
example_document.custom_metadata.extend(document_metadata)

# Make the CreateDocument request
# corpus_resource_name is a variable set in the "Create a corpus" section.
create_document_request = glm.CreateDocumentRequest(parent=corpus_resource_name, document=example_document)
create_document_response = retriever_service_client.create_document(create_document_request)

# Set the `document_resource_name` for subsequent sections.
document_resource_name = create_document_response.name
print(create_document_response)

# Chunks - add another webpage from Google for Developers
with(urlopen("https://developers.googleblog.com/2023/12/how-its-made-gemini-multimodal-prompting.html")) as f:
  html = f.read().decode("utf-8")

# Chunk the file using HtmlChunker
chunker = HtmlChunker(
    max_words_per_aggregate_passage=100,
    greedily_aggregate_sibling_nodes=False,
)
passages = chunker.chunk(html)

# Create `Chunk` entities.
chunks = []
for passage in passages:
    chunk = glm.Chunk(data={'string_value': passage})
    chunk.custom_metadata.append(glm.CustomMetadata(key="tags",
                                                    string_list_value=glm.StringList(
                                                        values=["Google For Developers", "Gemini API", "Blog", "Announcement"])))
    chunk.custom_metadata.append(glm.CustomMetadata(key="chunking_strategy",
                                                    string_value="no_aggregate_sibling_nodes"))
    chunk.custom_metadata.append(glm.CustomMetadata(key = "publish_date",
                                                    numeric_value = 20231206))
    chunks.append(chunk)

# Make the request
create_chunk_requests = []
for chunk in chunks:
  create_chunk_requests.append(glm.CreateChunkRequest(parent=document_resource_name, chunk=chunk))
request = glm.BatchCreateChunksRequest(parent=document_resource_name, requests=create_chunk_requests)
response = retriever_service_client.batch_create_chunks(request)
print(response)
Query the corpus
Use the QueryCorpusRequest method to perform semantic search to get relevant passages.
results_count: Specify the number of passages to return. Maximum is 100. If unspecified, the API returns a maximum of 10Chunks.metadata_filters: Filter bychunk_metadataordocument_metadata. EachMetadataFilterneeds to correspond to a unique key. MultipleMetadataFilterobjects are joined by logicalANDs. Similar metadata filter conditions are joined by logicalORs. Some examples:
(year >= 2020 OR year < 2010) AND (genre = drama OR genre = action)

metadata_filter = [
  {
    key = "document.custom_metadata.year"
    conditions = [
      {int_value = 2020, operation = GREATER_EQUAL},
      {int_value = 2010, operation = LESS}]
  },
  {
    key = "document.custom_metadata.genre"
    conditions = [
      {string_value = "drama", operation = EQUAL},
      {string_value = "action", operation = EQUAL} }]
  }]
Note that only numeric values support "AND"s for the same key. String values only support "OR"s for the same key.
("Google for Developers" in tags) and (20230314 > publish_date)

metadata_filter = [
 {
    key = "chunk.custom_metadata.tags"
    conditions = [
    {string_value = 'Google for Developers', operation = INCLUDES},
  },
  {
    key = "chunk.custom_metadata.publish_date"
    conditions = [
    {numeric_value = 20230314, operation = GREATER_EQUAL}]
  }]
user_query = "What is the purpose of Project IDX?"
results_count = 5

# Add metadata filters for both chunk and document.
chunk_metadata_filter = glm.MetadataFilter(key='chunk.custom_metadata.tags',
                                           conditions=[glm.Condition(
                                              string_value='Google For Developers',
                                              operation=glm.Condition.Operator.INCLUDES)])

# Make the request
# corpus_resource_name is a variable set in the "Create a corpus" section.
request = glm.QueryCorpusRequest(name=corpus_resource_name,
                                 query=user_query,
                                 results_count=results_count,
                                 metadata_filters=[chunk_metadata_filter])
query_corpus_response = retriever_service_client.query_corpus(request)
print(query_corpus_response)
Attributed Question-Answering
Use the GenerateAnswer method to perform Attributed Question-Answering over your document, corpus, or a set of passages.
Attributed Question-Answering (AQA) refers to answering questions grounded to a given context and providing attributions(s), while minimizing hallucination.
GenerateAnswer provides several advantages over using an untuned LLM, in cases where AQA is desired:
- The underlying model has been trained to return only answers that are grounded in the supplied context.
- It identifies attributions (segments of the supplied context that contributed to the answer). Attributions enable the user to verify the answer.
- It estimates the
answerable_probabilityfor a given (question, context) pair, which further empowers you to divert product behavior depending on how likely the returned answer is to be grounded and correct.
answerable_probability and the “I don’t know” problem
In some instances, the best response to the question is in fact “I don’t know”. For example, if the provided context does not contain the answer to the question, then the question is considered to be “unanswerable”.
The AQA model is highly adept at recognizing such cases. It can even distinguish between degrees of answerability and unanswerability.
However, the GenerateAnswer API puts the final decision-making power in your hands by:
- Always attempting to return a grounded answer - even when that answer is relatively unlikely to be grounded and correct.
- Returning a value
answerable_probability- The model's estimate of the probability that the answer is grounded and correct.
A low answerable_probability may be explained by 1 or more of the following factors:
- The model is not confident that its answer is correct.
- The model is not confident that its answer is grounded in the cited passages; The answer may be derived instead from world knowledge. For example:
question="1+1=?", passages=["2+2=4”]→answer=2, answerable_probability=0.02 - The model provided relevant information that did not completely answer the question. Example:
question="Is it available in my size?, passages=["Available in sizes 5-11"]→answer="Yes it is available in sizes 5-11", answerable_probability=0.03" - No well-formed question was asked in the GenerateAnswerRequest.
Since a low answerable_probability indicates that the GenerateAnswerResponse.answer is likely wrong or ungrounded, it is highly recommended to further process the response by inspecting answerable_probability.
When answerable_probability is low, some clients may wish to:
- Display a message to the effect of "couldn't answer that question" to the end user.
- Fall back to a general-purpose LLM that answers the question from world knowledge. The threshold and nature of such fallbacks will depend on individual use cases. A value of
answerable_probability<= 0.5 is a good starting threshold.
AQA Helpful Tips
For full API specifications, refer to the GenerateAnswerRequest API Reference.
- Passage length: Up to 300 tokens per passage are recommended.
- Passage sorting:
- If you provide
GenerateAnswerRequest.inline_passages, the passages should be sorted in decreasing order of relevance to the query. If the model's context length limit is exceeded, the last (least-relevant) passages will be omitted. - If you provide
GenerateAnswerRequest.semantic_retriever, then relevance sorting will be done automatically for you.
- If you provide
- Limitations: The AQA model is specialized for question-answering. For other use cases such as creative writing, summarization, etc., please call a general-purpose model via GenerateContent.
- Chat: If the user input is known to be a question that may be answerable from a certain context, then AQA can answer chat queries. But if user input may be any type of entry, then a general-purpose model may be a better choice.
- Temperature:
- Generally, a relatively low (~0.2) temperature is recommended for accurate AQA.
- If your use case relies on deterministic outputs, then set temperature=0.
user_query = "What is the purpose of Project IDX?"
answer_style = "ABSTRACTIVE" # Or VERBOSE, EXTRACTIVE
MODEL_NAME = "models/aqa"

# Make the request
# corpus_resource_name is a variable set in the "Create a corpus" section.
content = glm.Content(parts=[glm.Part(text=user_query)])
retriever_config = glm.SemanticRetrieverConfig(source=corpus_resource_name, query=content)
req = glm.GenerateAnswerRequest(model=MODEL_NAME,
                                contents=[content],
                                semantic_retriever=retriever_config,
                                answer_style=answer_style)
aqa_response = generative_service_client.generate_answer(req)
print(aqa_response)
# Get the metadata from the first attributed passages for the source
chunk_resource_name = aqa_response.answer.grounding_attributions[0].source_id.semantic_retriever_chunk.chunk
get_chunk_response = retriever_service_client.get_chunk(name=chunk_resource_name)
print(get_chunk_response)
More Options: AQA Using Inline Passages
Alternatively, you can use the AQA endpoint directly, without using the Semantic Retriever API by passing inline_passages.
user_query = "What is AQA from Google?"
user_query_content = glm.Content(parts=[glm.Part(text=user_query)])
answer_style = "VERBOSE" # or ABSTRACTIVE, EXTRACTIVE
MODEL_NAME = "models/aqa"

# Create the grounding inline passages
grounding_passages = glm.GroundingPassages()
passage_a = glm.Content(parts=[glm.Part(text="Attributed Question and Answering (AQA) refers to answering questions grounded to a given corpus and providing citation")])
grounding_passages.passages.append(glm.GroundingPassage(content=passage_a, id="001"))
passage_b = glm.Content(parts=[glm.Part(text="An LLM is not designed to generate content grounded in a set of passages. Although instructing an LLM to answer questions only based on a set of passages reduces hallucination, hallucination still often occurs when LLMs generate responses unsupported by facts provided by passages")])
grounding_passages.passages.append(glm.GroundingPassage(content=passage_b, id="002"))
passage_c = glm.Content(parts=[glm.Part(text="Hallucination is one of the biggest problems in Large Language Models (LLM) development. Large Language Models (LLMs) could produce responses that are fictitious and incorrect, which significantly impacts the usefulness and trustworthiness of applications built with language models.")])
grounding_passages.passages.append(glm.GroundingPassage(content=passage_c, id="003"))

# Create the request
req = glm.GenerateAnswerRequest(model=MODEL_NAME,
                                contents=[user_query_content],
                                inline_passages=grounding_passages,
                                answer_style=answer_style)
aqa_response = generative_service_client.generate_answer(req)
print(aqa_response)
Share the corpus
You can choose to share the corpus with others using the CreatePermissionRequest API.
Constraints:
- There are 2 roles for sharing:
READERandEDITOR.- A
READERcan query the corpus. - A
WRITERhas reader's permissions and additionally can edit and share the corpus.
- A
- A corpus can be public by granting
EVERYONEasuser_typeread access.
# Replace your-email@gmail.com with the email added as a test user in the OAuth Quickstart
shared_user_email = "TODO-your-email@gmail.com" #  @param {type:"string"}
user_type = "USER"
role = "READER"

# Make the request
# corpus_resource_name is a variable set in the "Create a corpus" section.
request = glm.CreatePermissionRequest(
    parent=corpus_resource_name,
    permission=glm.Permission(grantee_type=user_type,
                              email_address=shared_user_email,
                              role=role))
create_permission_response = permission_service_client.create_permission(request)
print(create_permission_response)
Delete the corpus
Use DeleteCorpusRequest to delete a user corpus and all associated Documents & Chunks.
Note that non-empty corpora will throw an error without specifying an force=True flag. If you set force=True, any Chunks and objects related to this Document will also be deleted.
If force=False (the default) and the Document contains any Chunks, a FAILED_PRECONDITION error will be returned.
# Set force to False if you don't want to delete non-empty corpora.
req = glm.DeleteCorpusRequest(name=corpus_resource_name, force=True)
delete_corpus_response = retriever_service_client.delete_corpus(req)
print("Successfully deleted corpus: " + corpus_resource_name)
Summary and further reading
This guide introduced the Semantic Retriever and Attributed Question & Answering (AQA) APIs of the Generative Language API and showed how you can use it to perform semantic information retrieval on your custom text data. Note that this API also works with the LlamaIndex data framework. Refer to the tutorial to learn more.
Also refer to the API docs to learn more about the other available functionalities.
Appendix: Setup OAuth with user credentials
Follow the steps below from the OAuth Quickstart to setup OAuth authentication.
Authorize credentials for a desktop application. To run this notebook in Colab, first rename your credential file (usually
client_secret_*.json) to justclient_secret.json. Then upload the file by using the file icon on the left sidebar, then the upload icon, as shown in the screenshot below.
# Replace TODO-your-project-name with the project used in the OAuth Quickstart
project_name = "TODO-your-project-name" #  @param {type:"string"}
# Replace TODO-your-email@gmail.com with the email added as a test user in the OAuth Quickstart
email = "TODO-your-email@gmail.com" #  @param {type:"string"}
# Rename the uploaded file to `client_secret.json` OR
# Change the variable `client_file_name` in the code below.
client_file_name = "client_secret.json"

# IMPORTANT: Follow the instructions from the output - you must copy the command
# to your terminal and copy the output after authentication back here.
!gcloud config set project $project_name
!gcloud config set account $email

# NOTE: The simplified project setup in this tutorial triggers a "Google hasn't verified this app." dialog.
# This is normal, click "Advanced" -> "Go to [app name] (unsafe)"
!gcloud auth application-default login --no-browser --client-id-file=$client_file_name --scopes="https://www.googleapis.com/auth/generative-language.retriever,https://www.googleapis.com/auth/cloud-platform"
Initialize the client library and re-run the notebook starting from Create a corpus.
import google.ai.generativelanguage as glm

generative_service_client = glm.GenerativeServiceClient()
retriever_service_client = glm.RetrieverServiceClient()
permission_service_client = glm.PermissionServiceClient()