
We love stories. Telling stories and doing other forms of creative writing can be challenging and rewarding. Building your own stories from a blank page, however, can seem daunting and even overwhelming at times. Artificial intelligence (AI) generative models can be a great tool to help you move past the blank page and build your narrative.
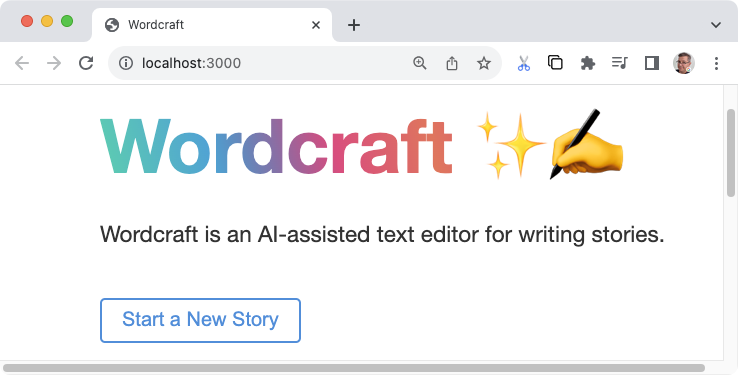
This tutorial shows you how to extend Wordcraft, an AI-powered story writing tool built by the Google People and AI Research team. This web application uses the Gemini API to help you build stories, bit by bit by generating ideas, writing parts of your stories, and revising content to add more detail. You can modify Wordcraft to more closely match your own style of writing, and build new writing controls to better support your workflow.
For a video overview of the project and how to extend it, including insights from the folks who build it, check out AI Writing Assistant - Build with Google AI. Otherwise you can get started extending the project following the instructions below.
Project setup
These instructions walk you through getting the Wordcraft project set up for development and testing. You need to install the prerequisite software, clone the project from the code repository, run the configuration installation, and set a few environment variables. You can test your setup by running the project after you complete these steps.
Install the prerequisites
The Wordcraft project uses Node and npm to manage packages and run the application. The following installation instructions are for a Linux host machine.
To install the required software:
- Install
nodeandnpmby following the installation instructions for your platform.
Clone and configure the project
Download the project code and use the npm installation command to download
the required dependencies and configure the project. You need
git source control software to retrieve the project
source code.
To download and configure the project code:
- Clone the git repository using the following command.
git clone https://github.com/PAIR-code/wordcraft
- Navigate to the Wordcraft project root directory.
cd wordcraft/
- Run the install command to download dependencies and configure the project:
npm install
Set environment variables
Set the environment variables that are required to allow the Wordcraft code project to run, specifically a Google Gemini API Key. The following installation instructions are for a Linux host machine.
To set the environment variables:
- Get a Google Gemini API Key and copy the key string.
- Navigate to the Wordcraft project root directory.`
cd wordcraft/
- Set the API Key as an environment variable. On Linux hosts, use the
following commands.
touch .env
echo "API_KEY="<YOUR_API_KEY>"" > .env
Test your setup
You should now be able to test your project setup by running Wordcraft on your device. This step is optional, but recommended.
To test your installation and setup:
- Navigate to the Wordcraft project root directory.
cd wordcraft/
- Running the project by it in development mode:
npm run dev
- In your web browser, navigate to the Wordcraft user interface. The
specific address is shown in the output of the previous command, for example:
http://localhost:3000/
Modify prompt example text
 Wordcraft creates prompts for the AI generative model using a set of examples for
each writing assistance operation, like the start new story and generate
text commands. The examples guide the generative model in generating text for
your story, and by modifying the examples for an operation, you can change the
output to follow a different pattern or style of writing. This approach is a
simple way to make Wordcraft write the way you want.
Wordcraft creates prompts for the AI generative model using a set of examples for
each writing assistance operation, like the start new story and generate
text commands. The examples guide the generative model in generating text for
your story, and by modifying the examples for an operation, you can change the
output to follow a different pattern or style of writing. This approach is a
simple way to make Wordcraft write the way you want.
The following example shows a modification of the new_story examples in
Wordcraft. The goal of this modification is to direct the AI generative model to
write story introductions using an internal monologue approach and use a style
that's more appropriate for a mystery novel. By writing a few examples of this
kind of story introduction, you can get the generative model to follow the general
pattern, but generate an introduction for a different theme.
To modify the new story examples in Wordcraft:
- Open the
wordcraft/app/context/json/new_story.jsonfile. - Modify the examples while maintaining the overall structure of the JSON
file. Here's an example modification for mystery story introduction using
an internal monologue style.
[ { "topic": "scientist disappears and their research into a new technology is gone", "target": "I got the call from the chief early Tuesday morning, before I'd even had a second sip of coffee. Terrible timing. Something about a researcher disappearing from the local university. Unusual for the research lab to ask for assistance, so I headed over to main lab building." }, { "topic": "a young woman wakes up with no memory", "target": "An unfamiliar ceiling with harsh, white lights greeted my eyes as I opened them. I looked around. White walls, medical equipment, a hospital? Wait. Where am I? How did I get here?!" }, { "topic": "old man tries to recall an important task as his memories gradually fade away", "target": "What was I supposed to do today? Feels like it was important. I stared into the kitchen cabinet full of mismatched mugs, mirroring my own confusion. What was it? Like someone is...in danger? A chill shot down my spine, but the details skittered off and hid in some dark corner of my head." }, { "topic": "billionaire is found dead in a hotel room", "target": "People meet their end every day, some naturally, some unnaturally. After 17 years of working as a homicide detective in Seattle, I'd seen a lot more of the unnatural variety than most. Comes with the job, along with a hard-learned sense of what side of the line any given incident sat on. This...was murder." }, { "topic": "retired covert operative gets dragged back into an old mission", "target": "Steam rose gently off the cup of Earl Grey sitting in front of me as I sat at the cafe, pedestrians and light traffic rolling by. The city was slowly waking up around me and my perfect Paris morning routine was shaping up nicely. Then I noticed that old familiar and unwelcome tingling on the back of my neck. I was being watched." } ] - Save the changes to the `new_story.json` file.
To test the modified new story operation:
- Navigate to the Wordcraft project root directory.
cd wordcraft/
- Run the project in development mode. If it is already running, you may
need to stop the app and restart it.
npm run dev
- In your web browser, navigate to the Wordcraft user interface. The
specific address is shown in the output of the previous command, for example:
http://localhost:3000/
- Navigate to the main menu of Wordcraft and select Start a New Story.
- Update the new story prompt or change it to what you want, then select start new story.
You can modify all the existing story writing controls in Wordcraft using this
technique. Trying changing other story controls by updating the examples in the
wordcraft/app/context/json/ directory.
Create new writing control
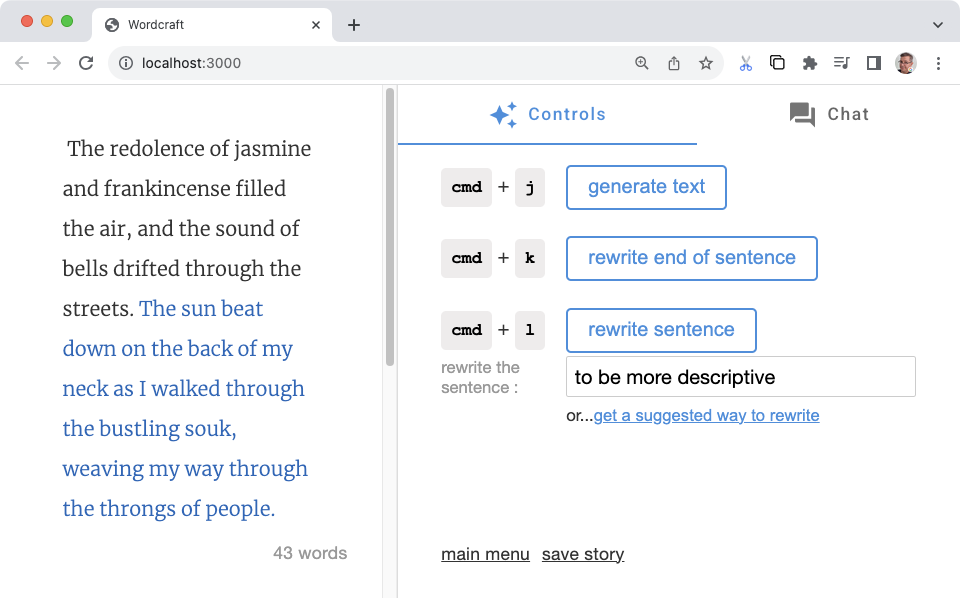
 The Wordcraft app is designed to be extended so you can add new writing
controls to assist you, similar to the generate text or rewrite sentence
buttons in the Controls tab on the right side of the app. Making these
modifications are a bit more effort, but allow you to mold the features of
Wordcraft to fit your workflow and goals.
The Wordcraft app is designed to be extended so you can add new writing
controls to assist you, similar to the generate text or rewrite sentence
buttons in the Controls tab on the right side of the app. Making these
modifications are a bit more effort, but allow you to mold the features of
Wordcraft to fit your workflow and goals.
The following example modification creates a new character control for Wordcraft. You can use it to introduce a new character to a story with a description of the attributes of that character. The foundation of this control is the same as other Wordcraft controls like the start new story control discussed earlier. You create a JSON file with a few examples of how you want characters to be introduced. The rest of the changes add the user interface and AI prompt management functions.
Create examples
Write a few examples of how you want the generative model to introduce characters. For example, do you want to describe them like a narrator, or do you want to introduce them by way of your main character's experience? The following examples use the latter approach, introducing new characters from the point of view of the main character. You add these examples with a new JSON file:
To add examples for the new control:
- Create a
wordcraft/app/context/json/new_character.jsonfile. - Create the examples in the JSON file. For this example, each example has
a
characterdescription field, which represents the prompt text, and atargetfield, which shows the expected output.[ { "character": "A character who is helpful and modest.", "target": "\"You lost, buddy?\" came a voice from behind me. Turning, I discovered a man dressed in a simple but presentable outfit. Small signs of age and loose threads hinted that these clothes, and the man himself, had seen better days." }, { "character": "A character who is attractive and devious.", "target": "Stepping out of the alley a little too quickly, I collided with something solidly muscular and surprisingly delicately scented. \"Sorry.\" I managed, regaining my balance. \"Easy there, buddy, you're gonna hurt yourself,\" came the reply from a man with an almost feline grace, further reinforced by a stare that reminded me of a hunting cat assessing its potential prey." }, { "character": "A character who is old and hesitant.", "target": "\"Excuse me. Do you know the way to the train station from here?\" I looked up from my phone to see a elderly woman in a threadbare coat, purse clutched with two hands in front of her. \"I-I'm supposed to meet my nephew there. Do... do you think you can help me?\"" }, { "character": "A character who is intelligent and aloof.", "target": "Bookish. That was my immediate reaction to this person I now saw in front of me. \"You're finally here. Did you read the notes I sent you?\" The voice sat squarely in between feminine and masculine intonation. \"No, of course you didn't.\" Dismissing my answer before I'd even formulated one. Annoyance immediately flushed through me." }, { "character": "A character who is clumsy and energetic.", "target": "\"Whoa!\" was the only warning I had before someone slammed into my back, almost knocking me off my feet. \"I'm so sorry! WOOO! These skates are a RUSH!\" The apology came from a rather loud redhead wearing rollerblades, dark glasses and a very beefy-looking pair of headphones. That explained the volume of the apology." } ] - Save the changes to the
new_character.jsonfile.
After creating your examples, modify the app/context/schema.ts and index.ts
files to reflect this new character control's prompt content.
To add the examples to the schema.ts file:
- Modify the
wordcraft/app/context/schema.tsfile to include the new character example data structure.export const newStorySchema = z.object({ topic: z.string(), target: z.string(), }); // add the following: export const newCharacterSchema = z.object({ character: z.string(), target: z.string(), });
Define an operation type which is associated with these new examples. This new type helps connect the prompt examples to the user interface and the prompt building code, which you modify in later steps.
To create a new operation type
- Modify the
wordcraft/app/core/shared/types.tsfile to add the new character operation type.export const enum OperationType { ... NEW_CHARACTER = 'NEW_CHARACTER', // add to list of types ... }
To register the examples in the index.ts file:
- In the
wordcraft/app/context/index.tsfile, import the new schema.import { continueSchema, ... newCharacterSchema // add new schema } from './schema'; - Import the new JSON file as
newCharacterJson.import newCharacterJson from './json/new_character.json';
- Register the new character example content in the application context.
export class WordcraftContext { constructor() { ... this.registerExamples( OperationType.NEW_CHARACTER, newCharacterSchema, newCharacterJson ); ... } - Export a
NewCharacterExampletype.export type NewCharacterExample = z.infer<typeof newCharacterSchema>;
Build user interface
Once you have created and registered the content generation examples, you can create the user interface for the new control. The bulk of the work for this phase is creating a new operation class and then registering that class with the main code of the Wordcraft application.
To create a new operation:
- In the
wordcraft/app/core/operations/directory, create a new operation class using one of the existing operations classes as a template. For the new character control, you can make a copy of thenew_story_operation.tsclass and rename it tonew_character_operation.ts. - Give the class a new name, and specify when the control appears in the
user interface by defining at least one
OperationSitevalue.export class NewCharacterOperation extends ChoiceOperation { static override isAvailable(operationSite: OperationSite) { return ( operationSite === OperationSite.END_OF_SECTION || operationSite === OperationSite.EMPTY_SECTION ); } - Set the
idfor the operation.static override id = OperationType.NEW_CHARACTER;
- Update the
getandrunfunctions to reflect the values of the schema parameters. This code handles getting the prompt text from the user interface for use in the AI prompt.private get character(): string { return NewCharacterOperation.controls.character.value; } async run() { const params = { character: this.character }; const choices = await this.getModel().newCharacter(params); this.setChoices(choices); } - Update the user interface text and descriptions.
  static override getButtonLabel() {
    return 'introduce character';
  }

  static override getDescription() {
    return 'Introduce a new character at the cursor.';
  }

  static override controls = {
    character: new TextareaControl({
      prefix: 'prompt',
      description: 'A prompt to introduce a new character.',
      value: 'A new character.',
    }),
  };
To register the new operation in the Wordcraft application:
- In the
wordcraft/app/core/operations/index.tsfile, add an import for the new operation.import {NewCharacterOperation} from './new_character_operation'; - In the same
index.tsfile, add an export for theNewCharacterOperationclass.export { ... NewCharacterOperation, // add this class ... }; - In the
wordcraft/app/main.tsfile, register the new operation.const operationsService = wordcraftCore.getService(OperationsService); operationsService.registerOperations( ... Operations.NewCharacterOperation, // add new operation ... );
Create prompt handling
As the final phase of creating the new control, you create the code that
handles generating prompts for the AI generative model and handles the response.
The main part of the work is to build a prompts handler in the
wordcraft/app/models/gemini/prompts/ directory that takes input from the user
interface and assembles a prompt to be passed to the generative model.
To define an interface for the prompt parameters:
- In the
wordcraft/app/core/shared/interfaces.tsfile, add an interface for the new operations prompting parameters.export interface NewCharacterPromptParams { character: string; }
To define a prompt handler for the new operation:
- In the
wordcraft/app/models/gemini/prompts/directory, create a new prompt handler class using one of the existing operations classes as a template. For the new character control, you can make a copy of thenew_story.tsclass and rename it tonew_character.tsas a starting point. - Define a prompt handler function and import the
NewCharacterExampleclass.import { NewCharacterPromptParams } from '@core/shared/interfaces'; import { NewCharacterExample, WordcraftContext } from '../../../context'; import { OperationType } from '@core/shared/types'; import { GeminiModel } from '..'; export function makePromptHandler(model: GeminiModel, context: WordcraftContext) { ... } - Build a
generatePrompt()function to get the user interface input for the AI model prompt.function generatePrompt(character: string) { const prefix = "Here's a character description: "; const suffix = "Introduce this character in the story."; if (character.trim() === '') { return 'Introduce a new character to the story.'; } else { return `${prefix}${model.wrap(character)}\n${suffix}`; } } - Create a
getPromptContext()function to assemble the user interface input with the example responses and build the complete prompt.function getPromptContext() { const examples = context.getExampleData( OperationType.NEW_CHARACTER ); let promptContext = model.getPromptPreamble(); examples.forEach((example) => { const { character, target } = example; const prompt = generatePrompt(character); promptContext += `${prompt} ${model.wrap(target)}\n\n`; }); return promptContext; }
To integrate the new character prompt handler:
- In the
wordcraft/app/models/gemini/index.tsfile, import the prompt handler for the new character operation.import {makePromptHandler as newCharacter} from './prompts/new_character'; - Add an override definition for the
newCharacterprompt handler.override newCharacter = this.makePromptHandler(newCharacter);
To register the prompt parameters with the model definition:
- In the
wordcraft/app/models/model.tsfile, add an import for the newNewCharacterPromptParamsinterface.import { ... NewCharacterPromptParams, ... } from '@core/shared/interfaces'; - Add
newCharacterprompt parameters to the model class.async newCharacter(params: NewCharacterPromptParams): Promise<ModelResults> { throw new Error('Not yet implemented'); }
Test the new writing control
Your new control should be ready to test in the Wordcraft interface. Make sure to check your code for compiling errors before proceeding.
To test the new character control:
- Navigate to the Wordcraft project root directory.`
cd wordcraft/
- Run the project in development mode:`
npm run dev
- In your web browser, navigate to the Wordcraft user interface. The
specific address is shown in the output of the previous command, for example:
http://localhost:3000/
- In the Wordcraft application, create a new story or open an existing story.
- In the story editing area, move your cursor to the end of the story. In the Controls tab on the right, the introduce character control should appear.
- In the introduce character field, type a brief description of the new character and then select the introduce character button.
Additional resources
For more information about the Wordcraft project, see the code repository. You can view the changes described in this tutorial in this pull request.
Production applications
If you plan to deploy a customized version of Wordcraft for a large audience, note that your use of the Google Gemini API may be subject to rate limiting and other use restrictions. If you are considering building a production application with the Gemini API like Docs Agent, check out Google Cloud Vertex AI services for increased scalability and reliability of your app.